Field Anchoring Setup
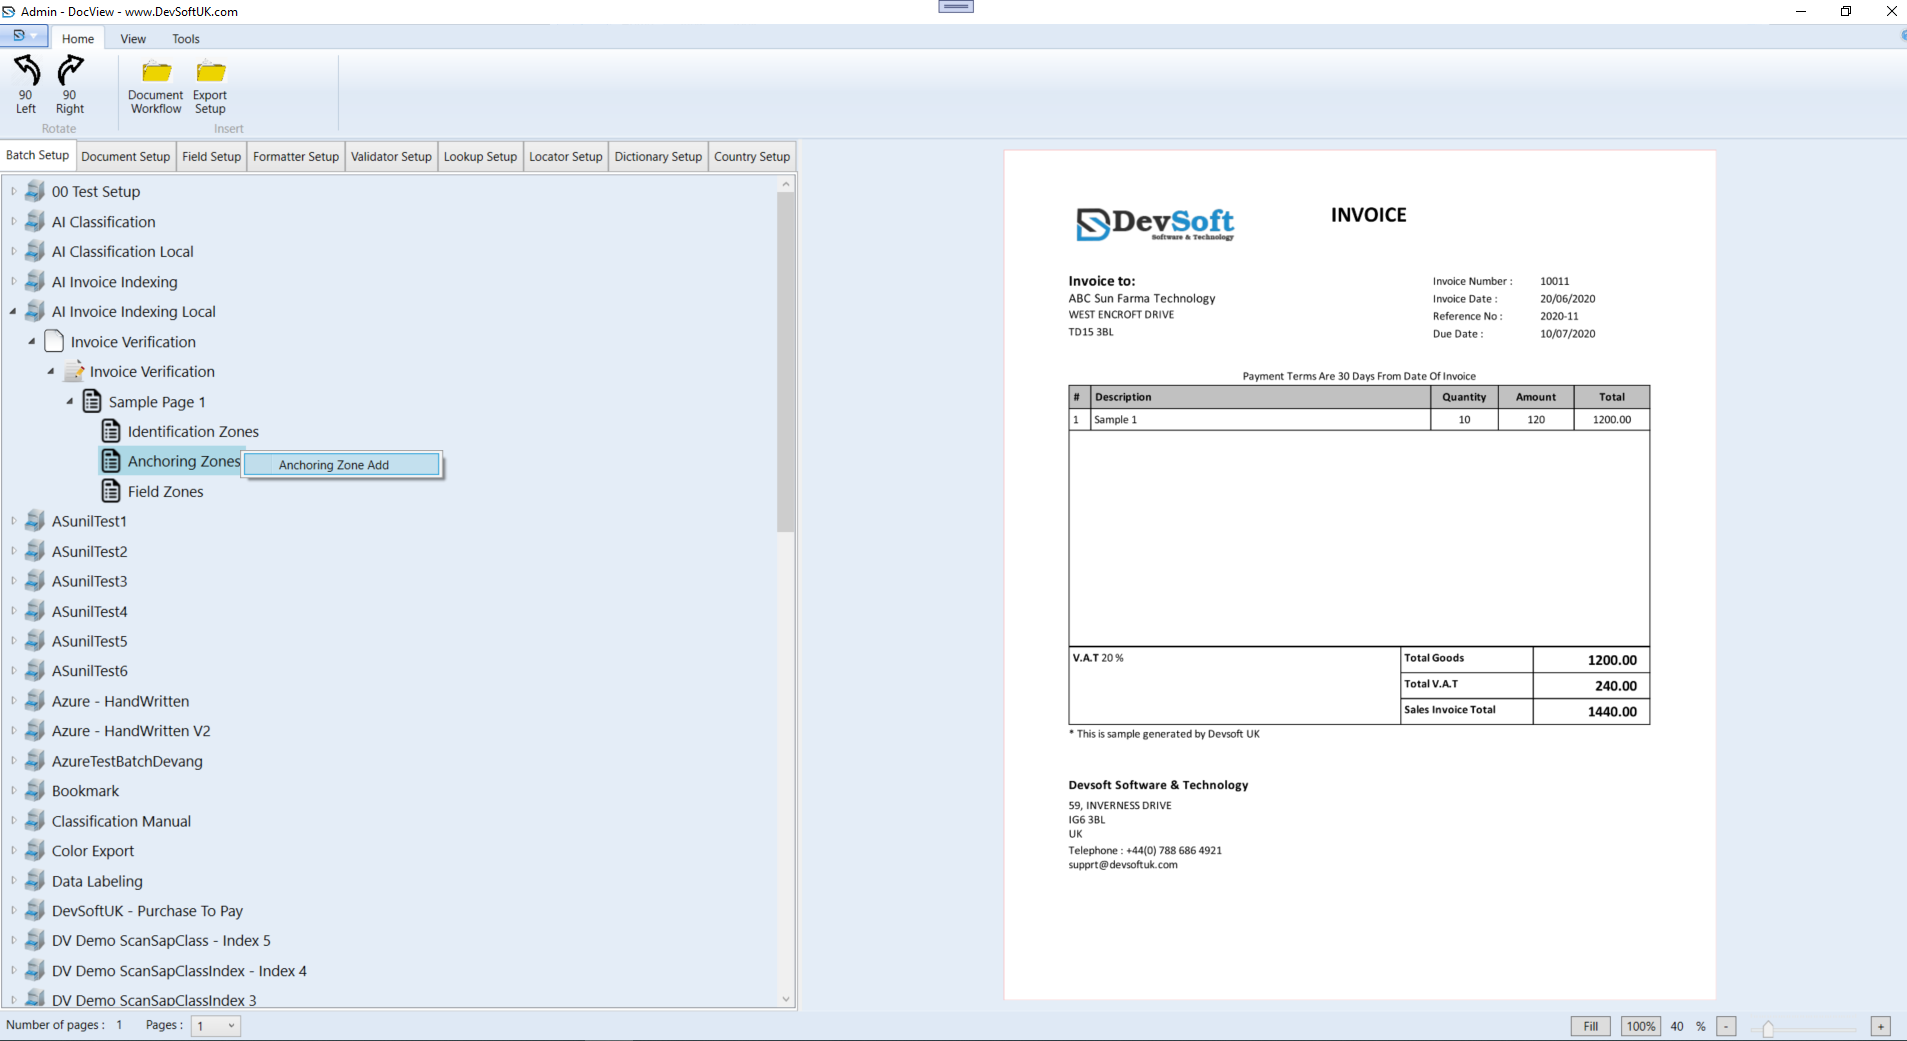
In DocView Capture, a Field Anchoring Zone defines reference areas (anchor points) on a document. These anchors help the system reliably locate and extract related field data during OCR (Optical Character Recognition) processing.
Adding an Anchoring Zone
- Open the required document setup (e.g. Invoice Verification > Sample Page 1).
- Right-click on the Anchoring Zones node.
- From the context menu, select Anchoring Zone Add.
Selecting the Anchor
- The document will appear on the right-hand side.
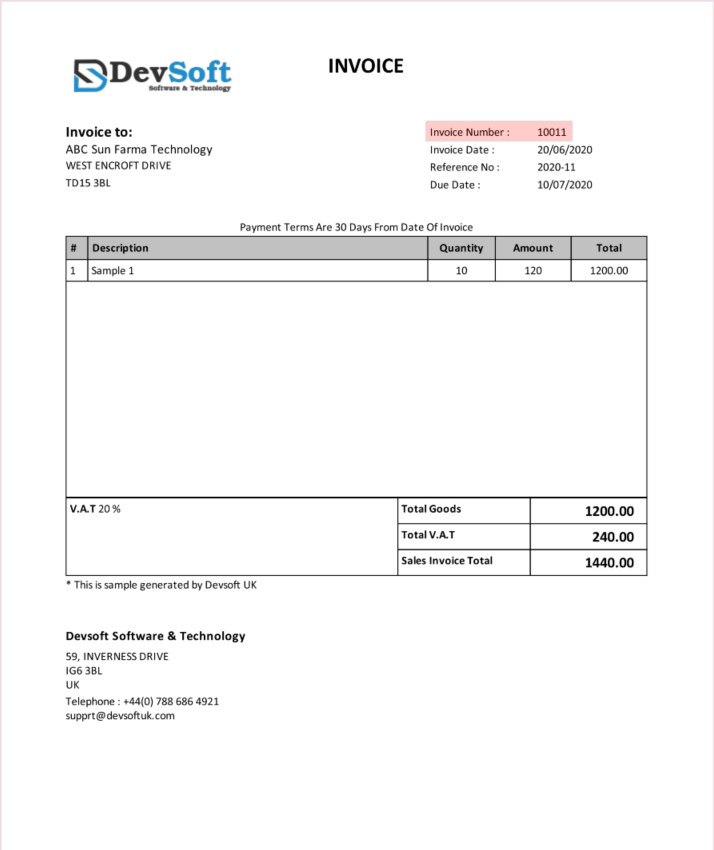
- Use the mouse to draw a rectangle around a fixed label or piece of text (e.g. Invoice Number :).
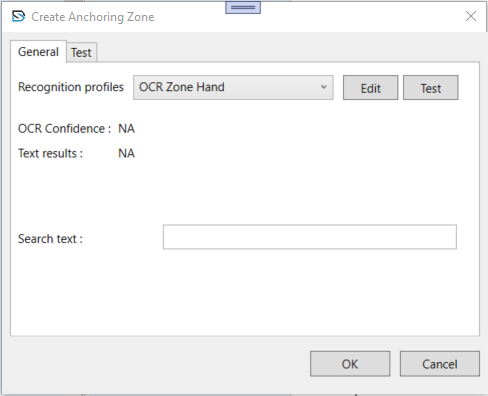
Configuring the Anchoring Zone
After drawing the anchor, the Create Anchoring Zone window appears.
General Tab
- Recognition Profiles – Select the OCR profile (e.g. OCR Zone Hand) used to read the anchor text.
- Search Text – Enter the exact or partial label text that will be used as the reference point.
Testing Section
- OCR Confidence / Text Results – Displays live recognition results when using the Test button. This helps confirm the anchor is correctly detected before saving.
Once configured, click OK to save. The new anchoring zone will appear under Anchoring Zones and will be used by DocView to position and extract linked field data accurately during processing.