Field Zone Setup
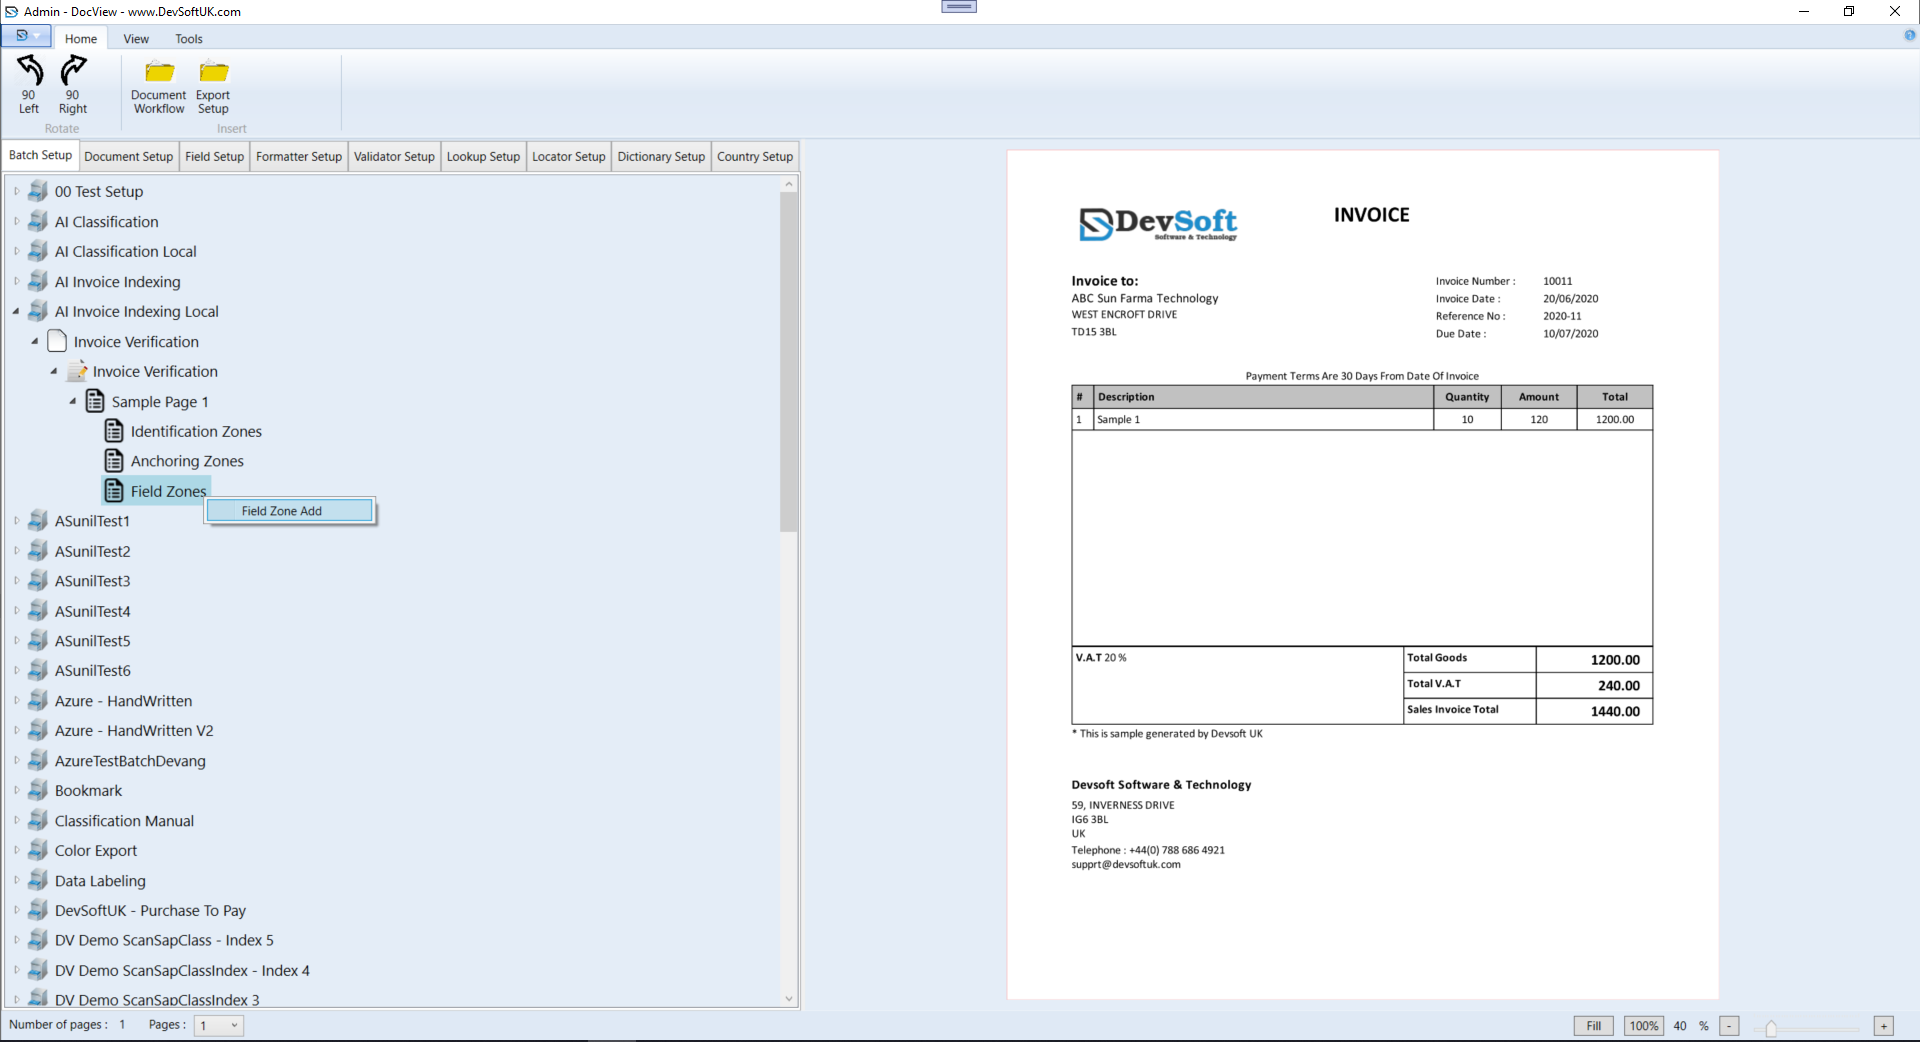
In DocView Capture, a Field Zone defines the exact area on a document where data should be extracted using OCR (Optical Character Recognition).
Field zones are linked to specific fields such as Invoice Number, Date, or Total Amount. Setting these zones correctly ensures accurate and automated indexing and classification of documents.
Adding a Field Zone
- Open the required document setup (e.g. Invoice Verification > Sample Page 1).
- Right-click on the Field Zones node.
- From the context menu, select Field Zone Add.
Selecting the Zone
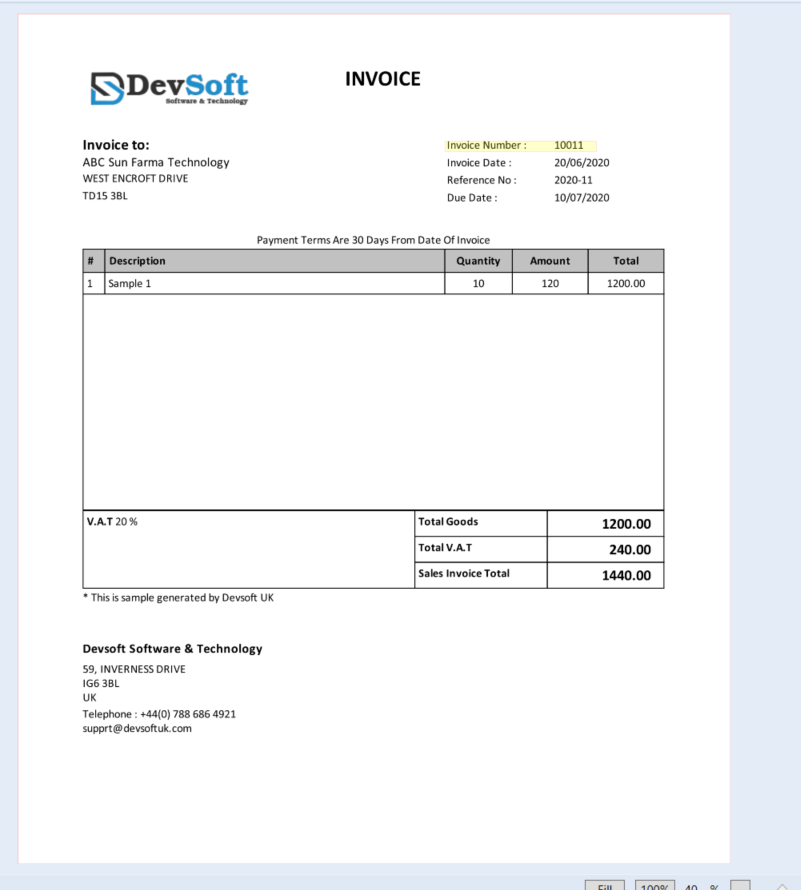
- The document will appear on the right-hand side.
- Using the mouse, draw a rectangle around the area containing the target data (e.g. the Invoice Number).
Configuring the Field Zone
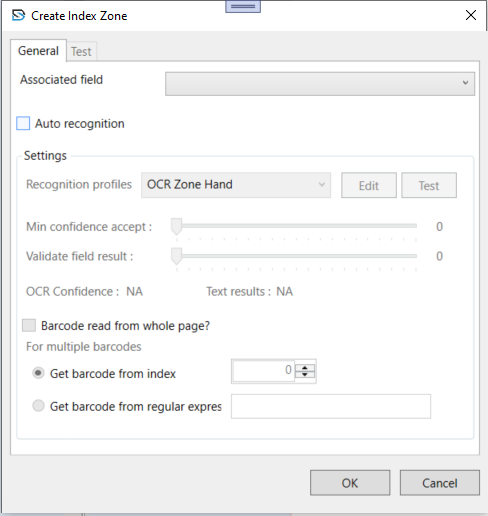
After drawing the zone, the Create Index Zone window appears.
General Tab
- Associated Field – Choose the field name this zone should map to (e.g. InvoiceNumber).
- Auto Recognition – Tick to let the system automatically extract data from this area.
Settings Tab
- Recognition Profiles – Select the OCR profile (e.g. OCR Zone Hand) for data reading.
- Min Confidence Accept – Set the minimum OCR confidence threshold.
- Validate Field Result – Define the validation confidence threshold to ensure accuracy.
- OCR Confidence / Text Results – Displays live test results when using the Test button.
Once configured, click OK to save. The new field zone will now appear under Field Zones and will be used by DocView during processing.