Batch Setup New - General Section
Use the settings in this section to create a new batch setup.
Modules
Workflow Agents
Sepration
Batch Settings
Scan Settings
QC Settings
Mannual scan Options
Cleanup and Search
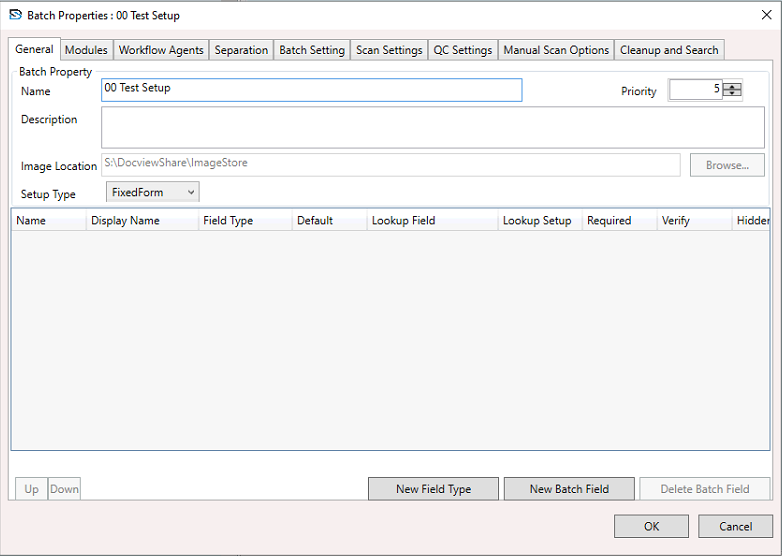
Batch setup name
PriorityThis is the initial priority for the batch setup. It can be any value from 1 to 10, where 1 is the highest priority and 10 is the lowest. The default is 5.
The priority value determines the order in which batches created from this setup are processed by each module.
It is especially important in unattended modules, where processing is automated. In attended modules, operators may choose batches in any order.
The initial value set here becomes the default priority when a batch is created using this setup.
It can later be modified in production by the Scan module operator or through the Batch Manager.
DescriptionThis description is for informational use only and appears whenever the batch properties are viewed.
Image LocationSpecify the folder path where images for this batch setup will be temporarily stored.
You can enter the path manually or browse to select the folder.
This location is used to store image files from the time they are captured by the DocView Capture module until they are exported to permanent storage.
Ensure the folder is accessible to all modules configured to process this batch setup.
Setup TypeFixed Form
Free Form
Batch DetailsTo define batch fields, click the 'New Batch Field' button and enter the required details in the Batch Fields table:
NameBy default, batch field names are generated as Nameₙ (where n is a number starting from 0). You can rename the field as needed.
Display Name
For each batch or index field, you can specify a Display Name. This name is shown in place of the actual field name across modules such as Scan, Validation, Verification, and Batch
Manager.
For example, if a field is named 00 Test Setup, you can set the Display Name to Customer Name so users see a more readable label. This is especially useful when localizing a batch class
for different regions—Display Names can be entered in the appropriate language.
If no Display Name is provided, the original field name will be displayed by default.
Field TypeSelect a Field Type for your batch field. All previously defined field types are available in the drop-down list. To create a new field type, click the New Field Type button.
DefaultEnter or select a default value for the batch field. You can either type a value or choose from the drop-down list of available DocView Capture values.
Look Up FieldEnables automatic data retrieval based on input from another field. It reduces manual entry and ensures data accuracy.
Lookup SetupDefines the source and rules for retrieving lookup values. Includes data source, key field, and fields to be auto-filled.
RequiredSelect True to make this field mandatory. A batch will not be created until a value is provided, typically by the Scan module or Batch Manager.
VerifyEnables manual review and correction of extracted data. Fields marked for verification will be presented to the user during the Verification stage to ensure accuracy.
HiddenSelect True to hide this field’s value from display.
Note: Required and Hidden cannot both be set to True—enabling one will automatically disable the other.
New Field Type ButtonOpens the Create Field Type window to define a custom field type. Once created, it appears in the Field Type drop-down and the Field Types tree view.
New Batch Field buttonAdds a new batch field to the Batch Fields table with default attribute values, which you can edit.
Alternatively, right-click in the table and select Insert, or press the Insert key to add a field—if a field is selected, the new one is inserted above it with the same attributes.
Delete Batch Field ButtonRemoves the selected batch field from the Batch Fields table.
You can also right-click the field and choose Delete, or press the Delete key on your keyboard.